
Making Plaster Prints
Making plaster prints is a fun and hands-on activity for Scouts. It works well at a den or patrol meeting, a day camp, or during a hike. Scouts enjoy working with their hands, and plaster is messy in a good way. This activity gives them a chance to be creative and learn something new.
You can use this activity with different age groups. Wolves might do this as part of the Digging in the Past Adventure and Bears can connect it to their Forensics Adventure. Scouts BSA can use it while working on the Mammal Study Merit Badge. Venturers might tie it in with conservation or outdoor skills.
This craft also fits well into STEM programs. Scouts learn about materials and mixtures. They also practice following directions. You can talk about how scientists and detectives use molds and casts in real life. That makes the learning more meaningful.
Plaster prints can also be used for service or displays. Scouts can make casts of animal tracks to show others what lives in their local area. They can give finished prints to a nature center. Or they can use them as part of a science fair or advancement project.
What the Mess Teaches
When your Scouts make plaster prints, they are learning more than just how to mix and pour. They are learning to follow directions. Plaster of Paris has to be mixed the right way. If they rush or skip steps, it won’t work. This teaches them to be careful and patient.
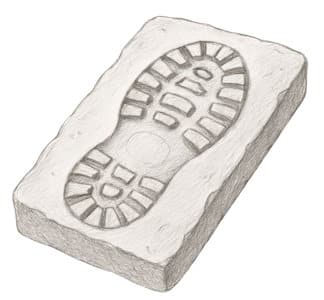
They also learn to observe. Scouts have to look closely at the object before they press it into the sand. They notice small details like lines on a leaf or patterns on a shoe. Later, when they look at the dried plaster, they can see how those details show up. This builds observation skills.
This activity also teaches problem solving. Sometimes things go wrong. Maybe the mix is too runny. Maybe the print doesn’t come out clearly. That’s okay. Let them try again or figure out what went wrong. Learning how to fix mistakes is an important part of growing.
Most of all, Scouts learn by doing. This is not just a sit-and-watch activity. It gets them up and moving. They get their hands dirty. They try something new. And at the end, they have something they made themselves. That builds confidence and pride.
Plaster Print Instructions
Materials:
- Sand (damp, not dry)
- Cardboard box or shallow tray
- Object to press (shoe, shell, leaf, animal track, etc.)
- Plaster of Paris
- Water
- Mixing bucket
- Mixing stick (old spoon or paint stick works)
- Measuring cup
- Old newspaper or plastic to cover work area
- Safety goggles (optional)
- Disposable gloves (optional)
Instructions:
- Cover your work area with newspaper or plastic. Plaster is messy.
- Fill the cardboard box about halfway with damp sand. The sand should hold its shape when pressed.
- Press your object into the sand to make a clear print. Then gently lift it out.
- In your bucket, mix the Plaster of Paris with water. Follow the directions on the package.
- Stir the mixture well until smooth. Use the mixing stick.
- Carefully pour the plaster into the sand mold. Fill it slowly.
- Let the plaster sit for several hours or overnight until it is hard.
- Once dry, lift the plaster out of the sand. Gently brush off any extra sand.
Safety Notes:
- Do not touch wet plaster with bare hands for too long. It can irritate the skin.
- Do not pour extra plaster down the sink. It can clog the drain. Let it harden first, then throw it away.
- Supervise younger Scouts closely during mixing and pouring.
Variations:
- Use natural objects like leaves or sticks to make nature prints.
- Try making a track mold on a hike. Bring damp sand in a tray, press a track, then pour plaster when back at your meeting place.
- Use this craft during a forensic-themed meeting to make “crime scene” shoe prints.
Scouts will enjoy making something they can take home or display. Keep it simple, and be ready for a little mess.

More Resources

Crafts for Scouts
Making plaster prints is just one fun and hands-on project your Scouts can try. If your group enjoys this kind of activity, there are many other crafts that work well for meetings, campouts, or rainy days. Crafts help keep Scouts engaged and let them be creative while learning new skills.
For more ideas, visit the Crafts for Scouts page on my website. You’ll find simple projects that are easy to set up and work well for different age groups. Some crafts can be used for advancement, others just for fun. Check it out here: Crafts for Scouts.

Frequently Asked Questions
What kind of sand should I use?
Use clean sand that is slightly damp. Sand from a sandbox or craft store works well. It should hold its shape when pressed.
Can I reuse the sand?
Yes, you can reuse the sand if it stays clean and damp. Just remove the plaster and smooth it out before using it again.
How long does the plaster take to dry?
It usually takes about 3 to 4 hours to harden. For best results, let it sit overnight.
Can Scouts take their plaster prints home?
Yes. Just make sure the plaster is dry before they pack it up. Wrap it in newspaper or place it in a small box to protect it.
Is Plaster of Paris safe to use?
It is safe if used with care. Don’t touch wet plaster for long. Wash hands after handling it. Don’t pour it down the drain.
What if the print doesn’t turn out?
That’s okay. Check your sand and mix again. Try pressing the object deeper or using a different one. Part of the learning is trying again.
Can I do this activity outside?
Yes. Doing it outside makes cleanup easier. Just bring water and a flat surface for the sand.
Can I use this for a badge or adventure?
Yes. It fits well with nature, forensics, and STEM-related requirements. Check your handbook to see where it fits best.
Messy Science, Lasting Prints
Making plaster prints is a simple craft that Scouts of all ages can enjoy. It’s messy in a fun way and gives them something to take home. This activity uses plaster of Paris and damp sand to make a cast of a shoe, shell, leaf, or animal track. It works well indoors or outside and doesn’t need a lot of fancy supplies.
This project fits with many parts of the Scouting program. Cub Scouts can connect it to adventures about nature or forensics. Scouts BSA and Venturers can use it during tracking or conservation activities. You can also use it to add hands-on learning to STEM events.
Scouts get more than just a finished print. They learn how to follow steps, mix materials, and observe details. They practice patience and problem-solving. It’s a good way to get them working together while having fun with science and art.
Plaster prints are also a good way to tie in outdoor learning. Pressing real animal tracks or objects found in nature helps Scouts pay attention to the world around them. These prints can be used for displays, presentations, or just something cool to show their family.
Leave a Reply