Materials Needed:
- One sheet of pegboard (about 2 feet by 4 feet)
- Pencil
- Yardstick or ruler
- Hand saw
- Sawhorses or workbench
- Safety glasses
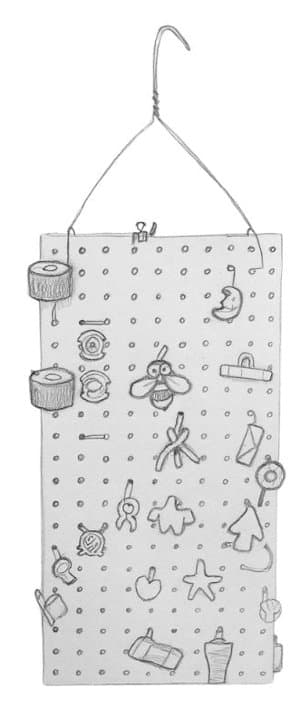
- Metal coat hanger
- Wire snips or cutters
- Twist ties or string
Instructions:
- Review safety rules with the Scouts. Make sure an adult is helping.
- Use the yardstick and pencil to measure and mark a 1-foot by 2-foot rectangle on the pegboard.
- Put on safety glasses.
- Place the pegboard on the sawhorses or workbench.
- Have an adult help hold the board steady.
- Use the hand saw to carefully cut out the 1-foot by 2-foot section.
- Use the wire snips to cut off the bottom straight part of the metal coat hanger.
- Choose one of the short sides of the pegboard to be the top.
- Push one end of the coat hanger into a hole near the top left corner.
- Twist the wire so it stays in the hole and does not slip out.
- Push the other end into a hole near the top right corner.
- Twist that end too, so it stays in place.
- Use twist ties or short strings to attach your neckerchief slides to the pegboard.
Notes:
- Always wear safety glasses when using tools.
- Adults should help with sawing and cutting the wire.
- You can paint or decorate the pegboard before adding the slides.
- If you don’t have a pegboard, you can use thick cardboard, wood, or foam board and poke holes in it.
- If a Scout has a large collection, you can make a bigger holder.
For more information, see https://scoutermom.com/321/neckerchief-slide-holder/