Materials:
- Clean, empty 15 oz cans (one for each constellation)
- Scissors
- Glue
- Hammer
- Nail
- Flashlight
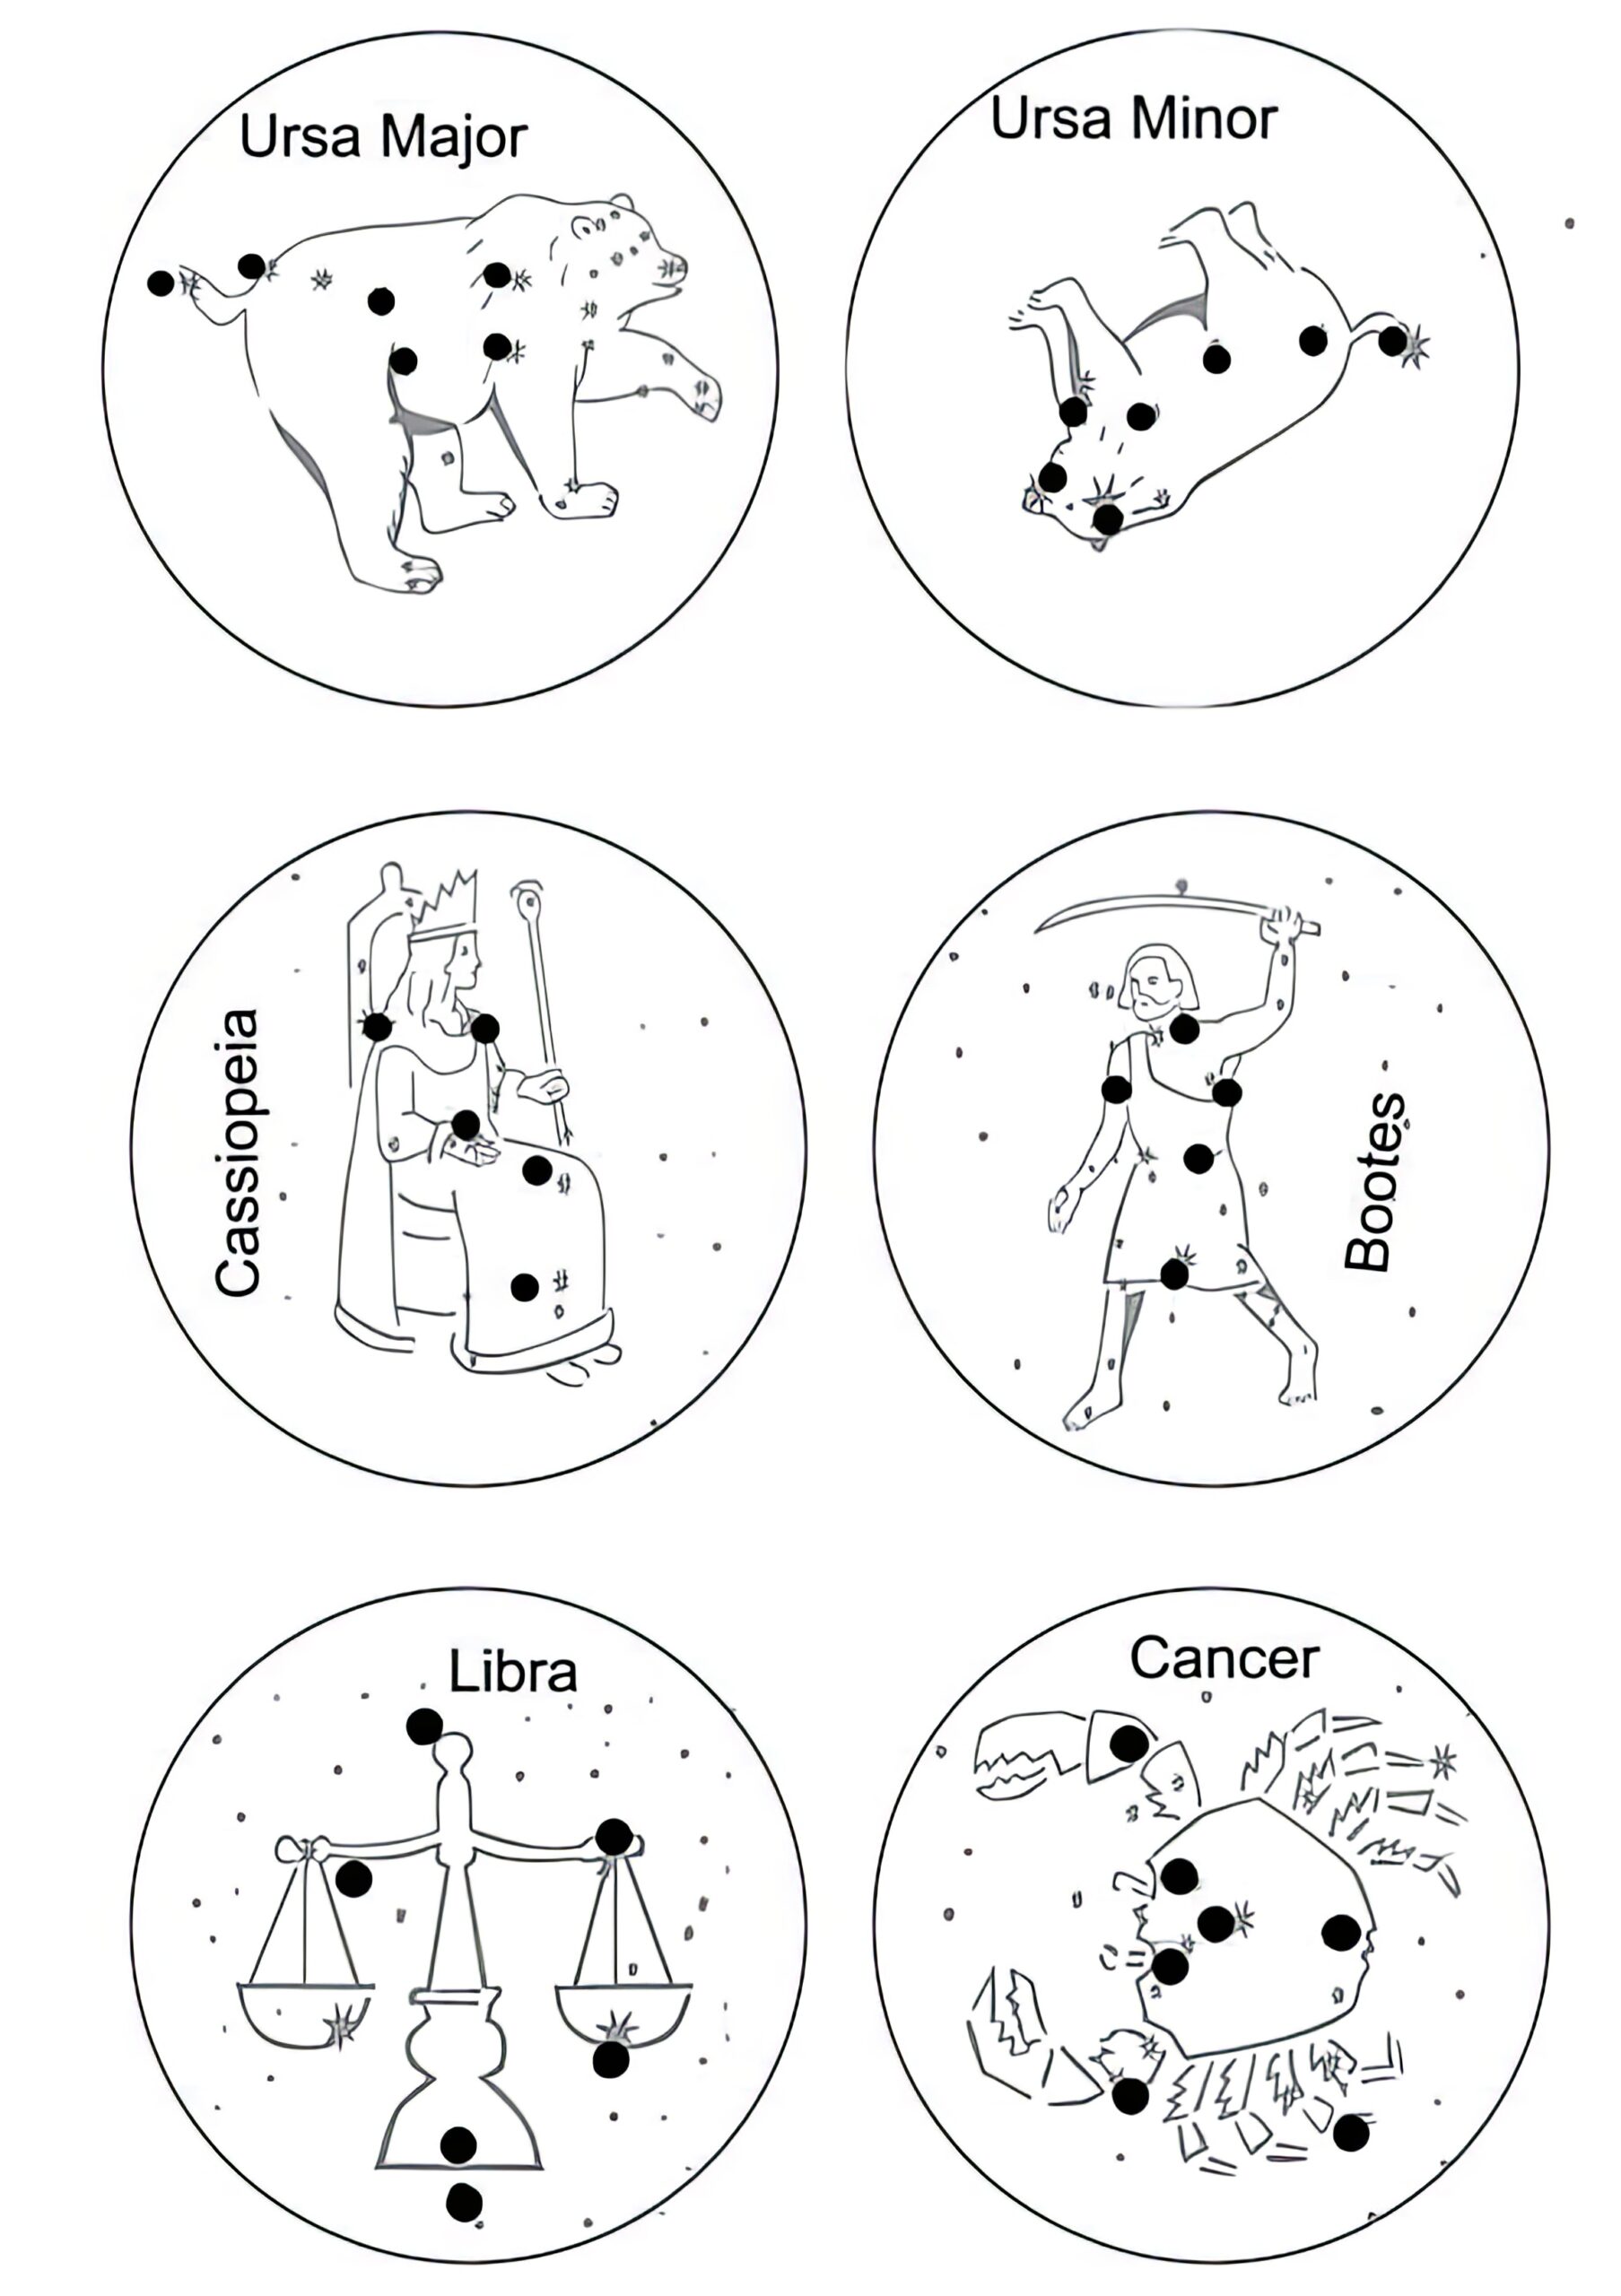
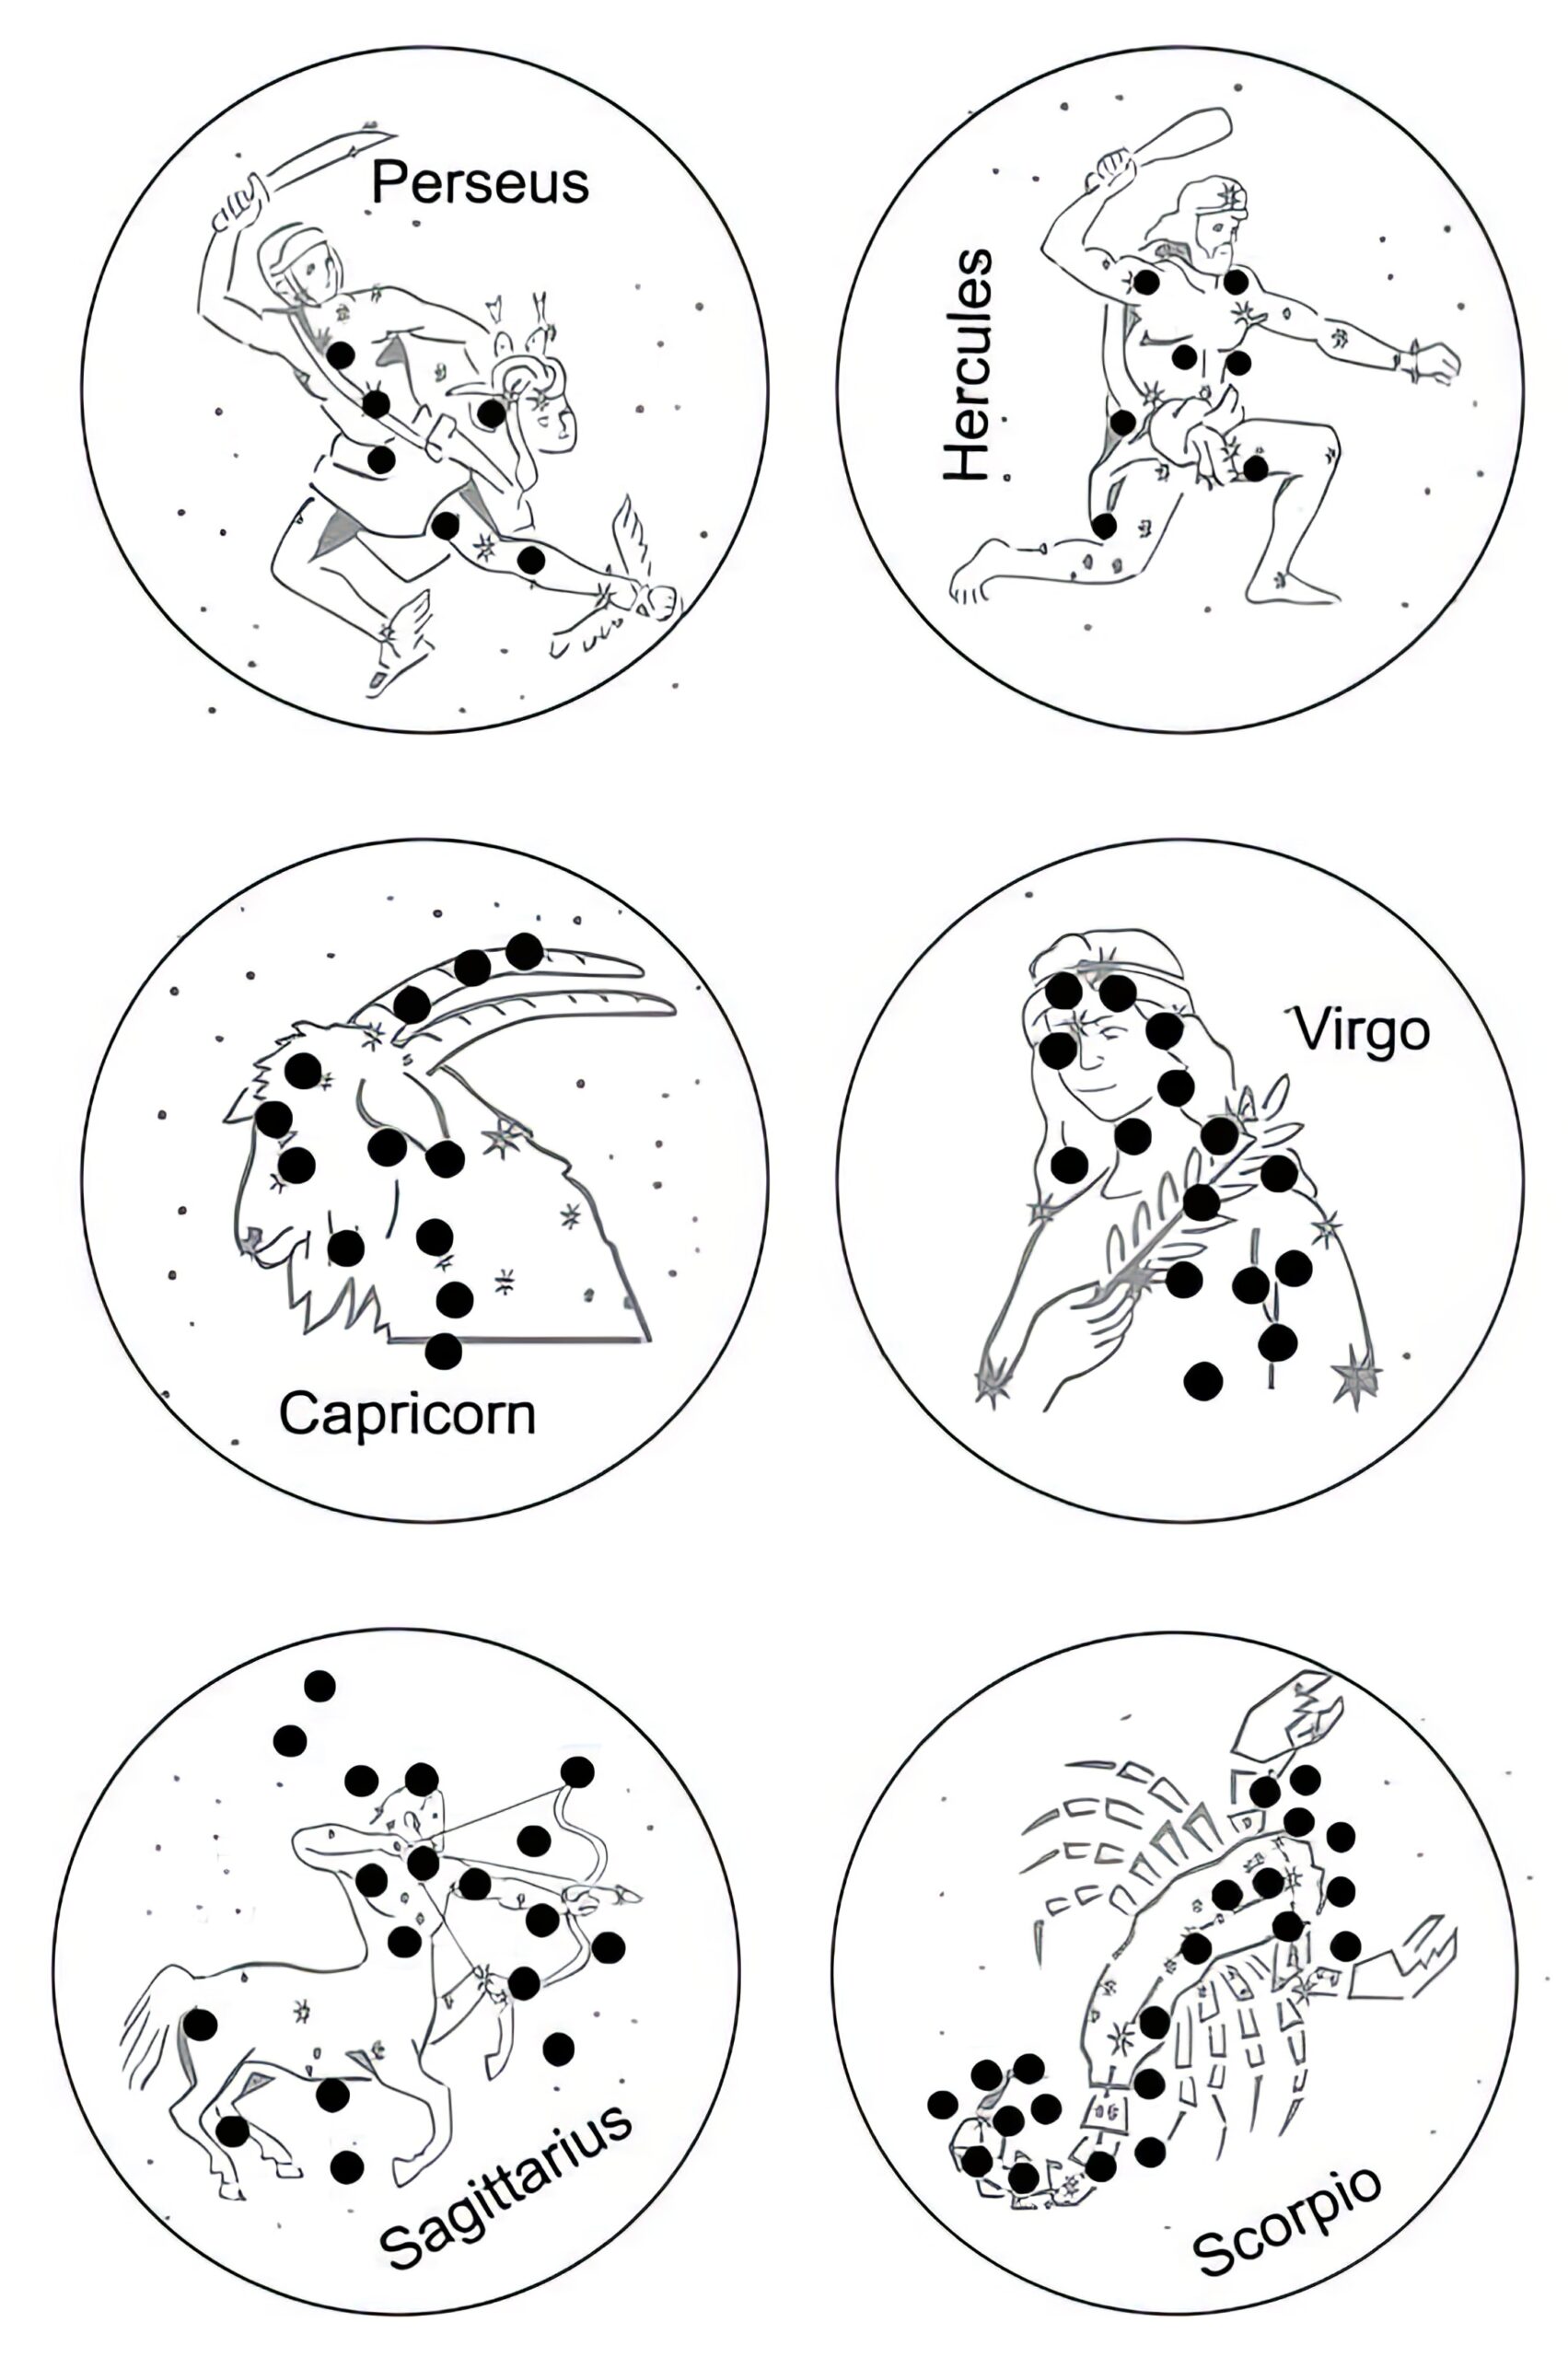
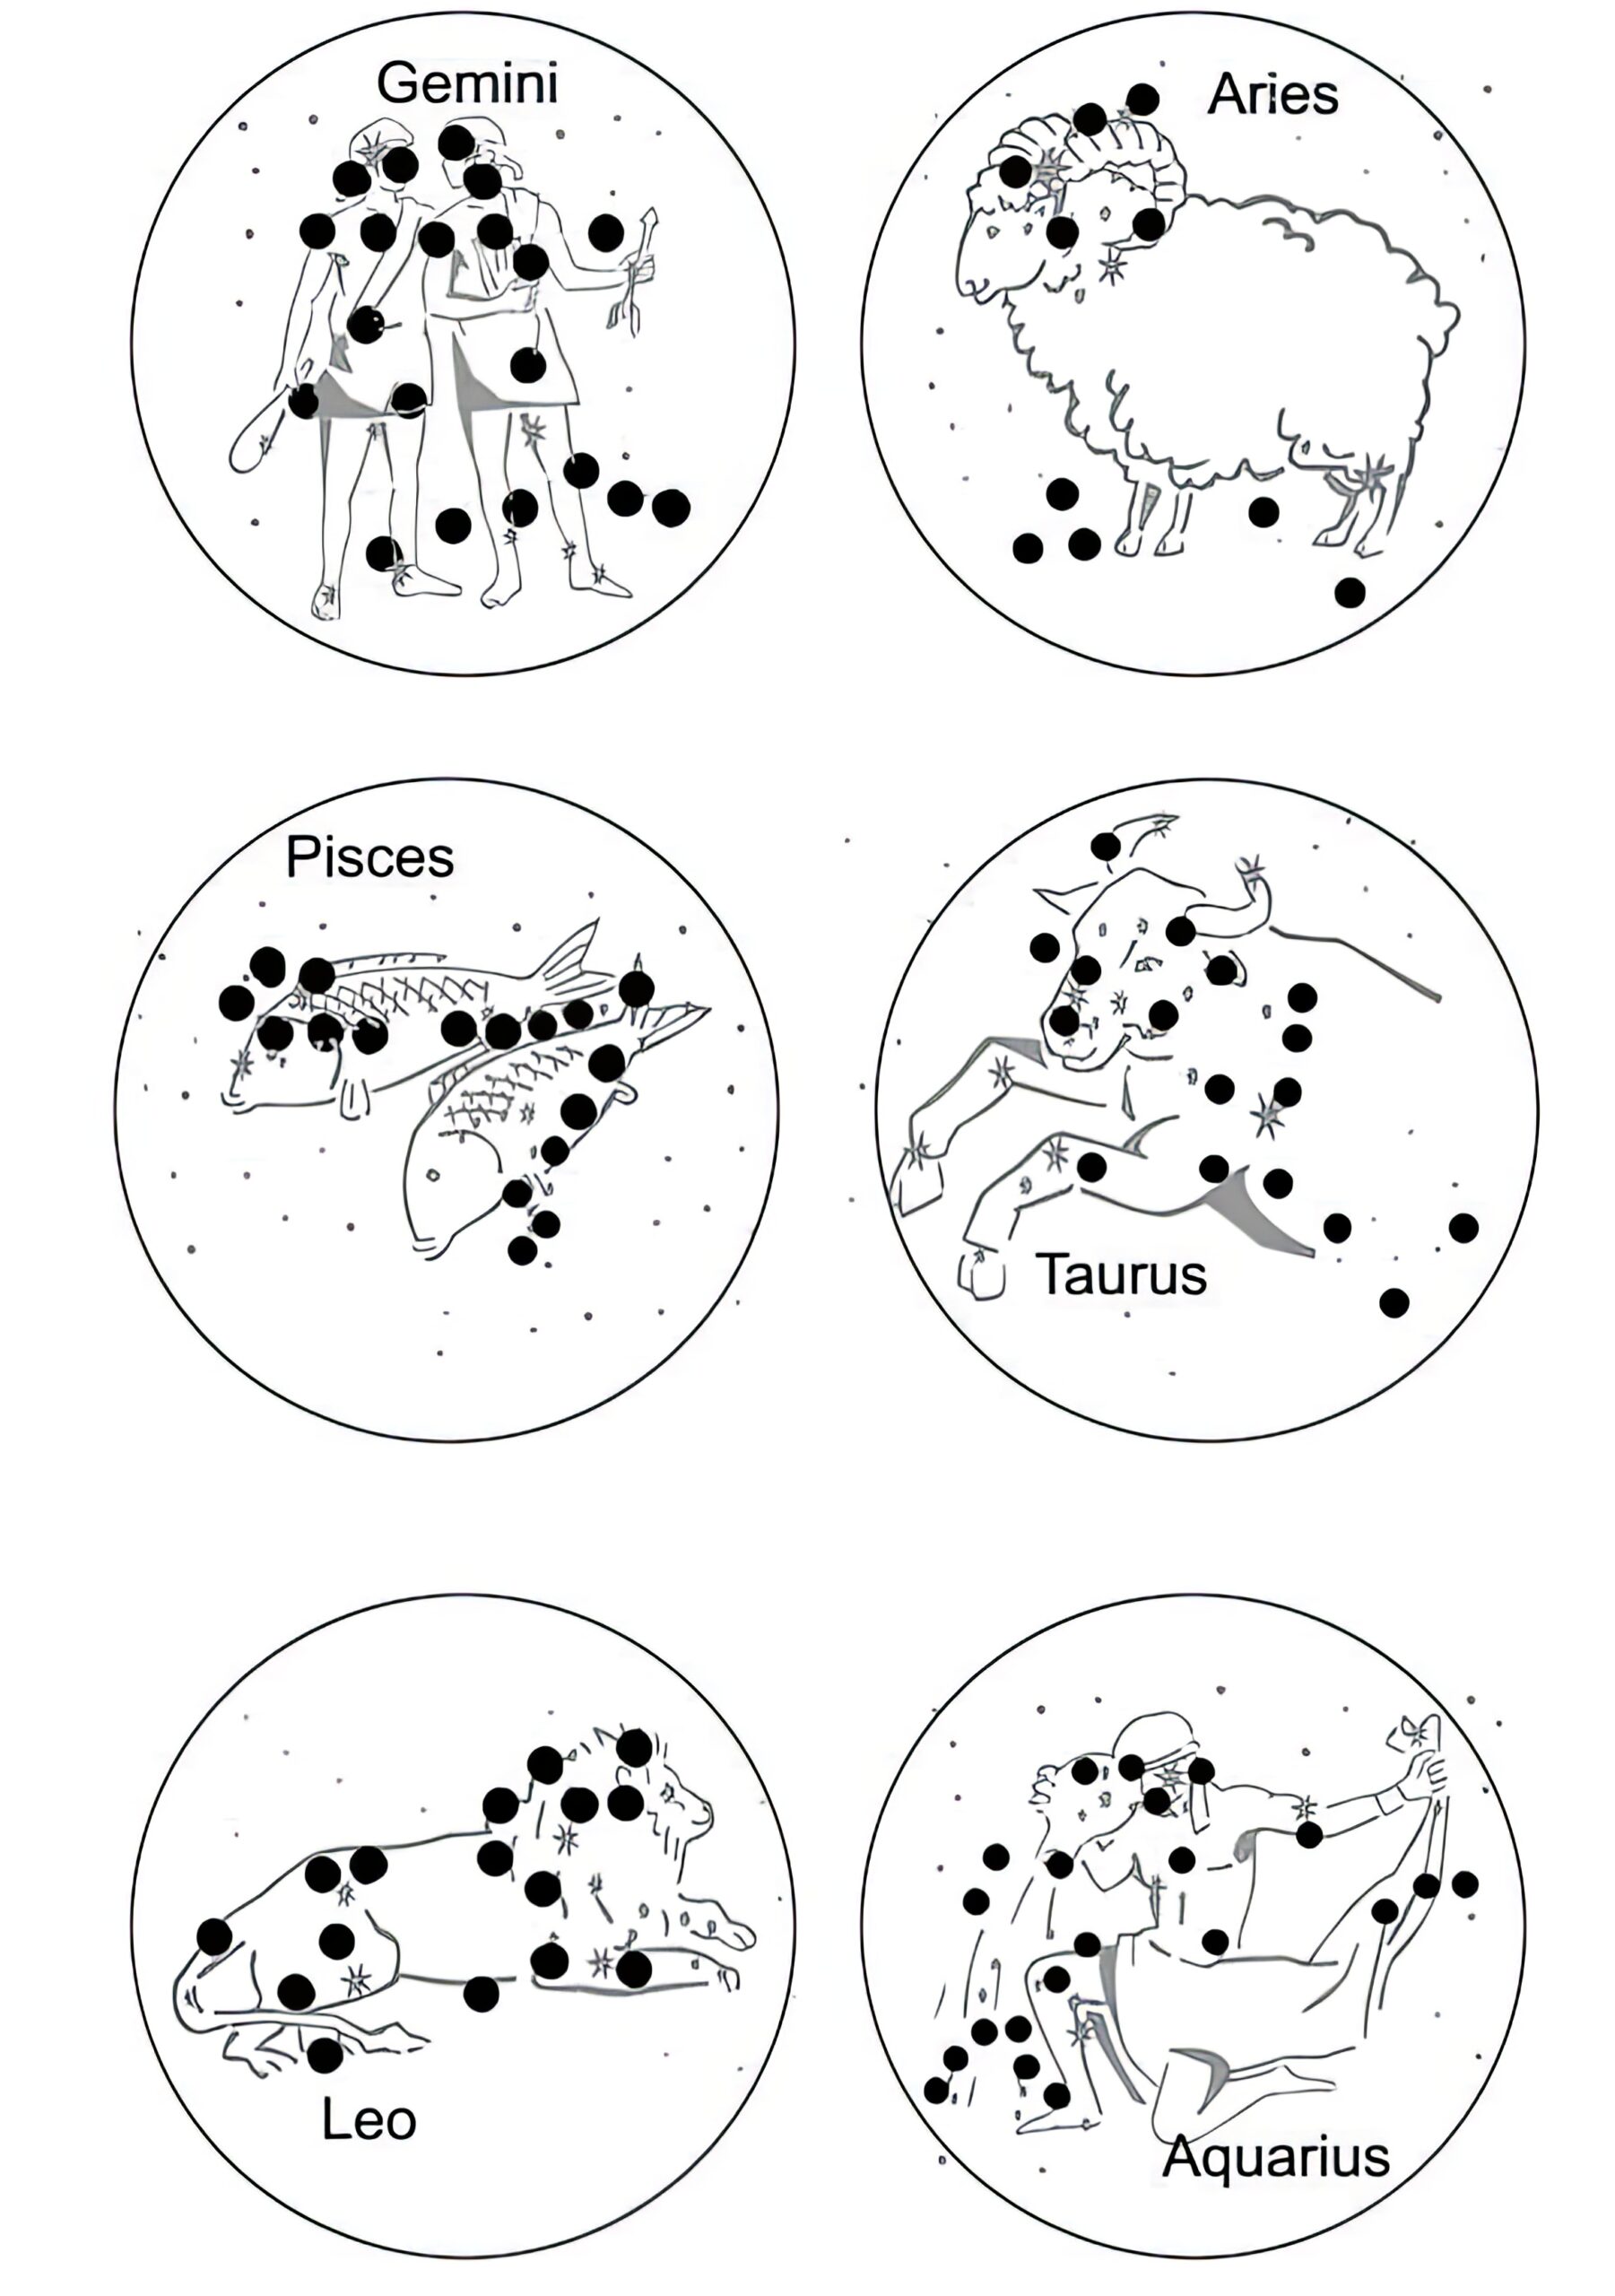
- Constellation patterns (see below)
Instructions:
- Print and cut out the constellation patterns.
- Glue each pattern to the open end of a can and let the glue dry.
- Place the can on a steady surface with the pattern facing up.
- Carefully use the hammer and nail to punch holes where the black dots are marked on the pattern. These dots represent the stars.
- Once all holes are punched, remove the paper pattern.
- Turn off the lights in the room.
- Place a flashlight in the can and turn it on. Look at the bottom of the can to see the constellation pattern projected through the holes.
Safety Tips:
- Always hammer on a stable surface.
- Keep fingers away from the nail when hammering.
- Adults should supervise younger Scouts.
Variations:
- Use different can sizes for a variety of constellation patterns.
- Experiment with hole sizes for brighter or dimmer “stars.”
- Try using colored flashlights for added effect.
This activity works best in a dark room for clearer star projections.
For more information, see https://scoutermom.com/24773/pinhole-planetariums/


