Materials Needed:
- Cardboard
- Scissors
- Brad (paper fastener)
- Hole punch or pencil (to make holes)
- Marker or pen (for tracing)
- Lipstick or washable marker (optional for safety practice)
Instructions:

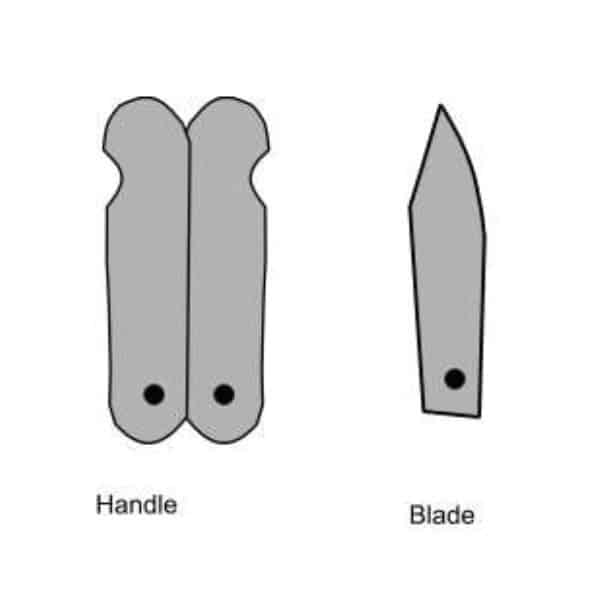
- Cut Out the Handle and Blade
- Draw the shape of a pocketknife handle and blade on cardboard.
- The handle should be a single long piece that can fold in half.
- The shapes don’t need to be perfect, just roughly the size of a real pocketknife.
- Cut out the handle and the blade carefully using scissors.
- Punch the Holes
- Mark a dot near the end of the blade where it will attach to the handle.
- Fold the handle in half and mark dots where the blade will fit.
- Use a hole punch or carefully poke the holes with a pencil. Make sure the holes line up.
- Attach the Blade to the Handle
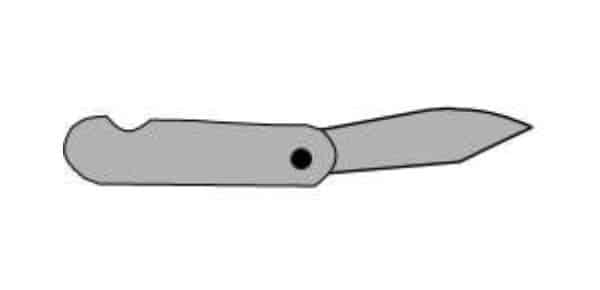
- Place the blade inside the folded handle so the holes line up.
- Insert the brad through all of the holes to connect the pieces.
- Flatten the ends of the brad to hold the pieces together securely.
- Test the “Knife”
- Open and close the cardboard knife to make sure it moves smoothly.
- Practice pretending to carve by moving the “blade” carefully as Scouts would with a real knife.

Notes for Leaders:
- Safety Practice: Put lipstick or washable marker on the edge of the blade. When Scouts “carve,” they can check their hands for marks to see if they’re holding or moving the knife unsafely.
- Reinforce Safety Rules: Use this craft as a chance to talk about proper knife safety, such as creating a “safety circle” and never using a knife toward yourself or others.
- Variations: If you don’t have brads, use a twist tie, string, or even a pipe cleaner to attach the blade. You can also decorate the handles to look more like real knives.
For more information, see https://scoutermom.com/17574/fake-pocketknife-for-safety-demonstrations/